As Google Home is not natively supported by Blink, you’ll have to use third-party apps like If This Then That (IFTTT) to connect them. IFTTT is an app that facilitates smart home automation for a lot of devices in the market.
While Blink cameras won’t work with Google Home, there are a handful of other camera brands you could opt for instead.
Connecting any Amazon Blink camera to your Google Home through IFTTT is a simple process - we'll walk you through everything you need to know below.
Connecting Blink Cameras to Google Home
Connecting Google Home and any Blink Camera through IFTTT
IFTTT (short for “if this then that”) is a digital automation app that allows for smart home device coordination - even between devices that don't normally support one another.
To do this, you’ll need to connect your smart home devices to the IFTTT app and create applets (connections between two or more devices or services) that activate based on triggers you set. For example, one common applet is to activate a device when you say a phrase on another device (trigger).
IFTTT will make these two products work together through the applet even if they’re not natively compatible, effectively serving as a digital middleman even for devices that can’t or won’t recognize each other!
The entire process is quite long, so we'll have to break it down into some broad "steps" to walk you through everything in the needed amount of detail.
Step 1: Connect Your Google Home and Blink camera to the IFTTT app
Be sure to create an account on the IFTTT app first. You'll also need to prepare your Google Home, the Google account linked to it, and your Blink Home Monitor App.
- On a phone or tablet, download the IFTTT app from the Google Play Store or Apple App Store. Once downloaded, open the app and create an account.
- On the IFTTT app’s home page, navigate to Explore at the bottom of the screen. Then, on the search bar, type Blink. Select Blink from the results that appear and then tap on Connect.
- On the prompt that asks you to sign into your Blink account, tap on Yes or Continue. You’ll then be redirected to your Blink Home Monitor app.
- A new prompt will ask you for access. Select Grant Access – this connects your Blink app and its associated cameras to IFTTT.
- Now to do the same for Google Home. Go back to the Explore page of your IFTTT app by tapping on its icon at the bottom of the screen.
- On the search bar, type Google Assistant. Pick Google Assistant from the results that appear, and then tap on Connect.
- A prompt to sign into your Google account will appear. Sign in with the account connected to your Google Home.
- After signing in, a new prompt will appear asking you for access - select Grant Access. Your Google Home is now connected to IFTTT.
Step 2: Create an IFTTT applet to coordinate your Blink camera and Google Home
With your Blink and Google Home accounts connected to your IFTTT app, it’s time to make the IFTTT trigger to coordinate your Blink cameras with your Google Home.
- Open the IFTTT app. Then, on the IFTTT app’s home page, tap on Create at the bottom of the screen.
- Tap on Add beside If This. On the list of services that’ll appear, select Google Assistant V2.
- If you can't immediately see Google Assistant V2, then type Google Assistant on the search bar. Tap on Google Assistant V2 once you see it in the results.
- Tap on Activate scene. This is the trigger that will activate your Blink camera. This can be a voice command or a time trigger, though the type will be set later.
- Name your scene. If it’s a voice trigger that will activate your cameras upon saying “arm cameras”, then a good name can be “voice: arm cameras”.
- Tap on Continue. You will return to the previous page where you can see If This and Then That.
- Tap on Add beside Then That. On the list of services that’ll appear, tap on Blink.
- If you can't immediately see Blink, then type Blink in the search bar. Tap on Blink once you see it in the results.
- Choose from the list of automated options for your Blink camera. A common choice is to arm or disarm specific camera systems.
- A form will appear. Simply tap on the back arrow key to complete creating the action. The new Then action will appear with your desired Blink camera action beside it.
- You can add another action for the same voice command or trigger by tapping on the ‘+’ symbol under Then.
- Once you’ve created your desired actions, tap Continue and name your applet. Preferably, if your applet is for arming a specific Blink camera system, then a good name would be “arm [name of camera system]”.
- After naming your applet, tap on Finished.
Your newly created applet will now allow you to facilitate automation between Google Home and your Blink camera. Now all that’s left to do is to make Google Home recognize the applet!
Step 3: Connect your Google Home to your IFTTT applet
Once you’ve made your applet connecting your Google Home to your Blink camera, you’ll need to have Google Home recognize the applet. To help you, refer to the image below, taken from the previous video.
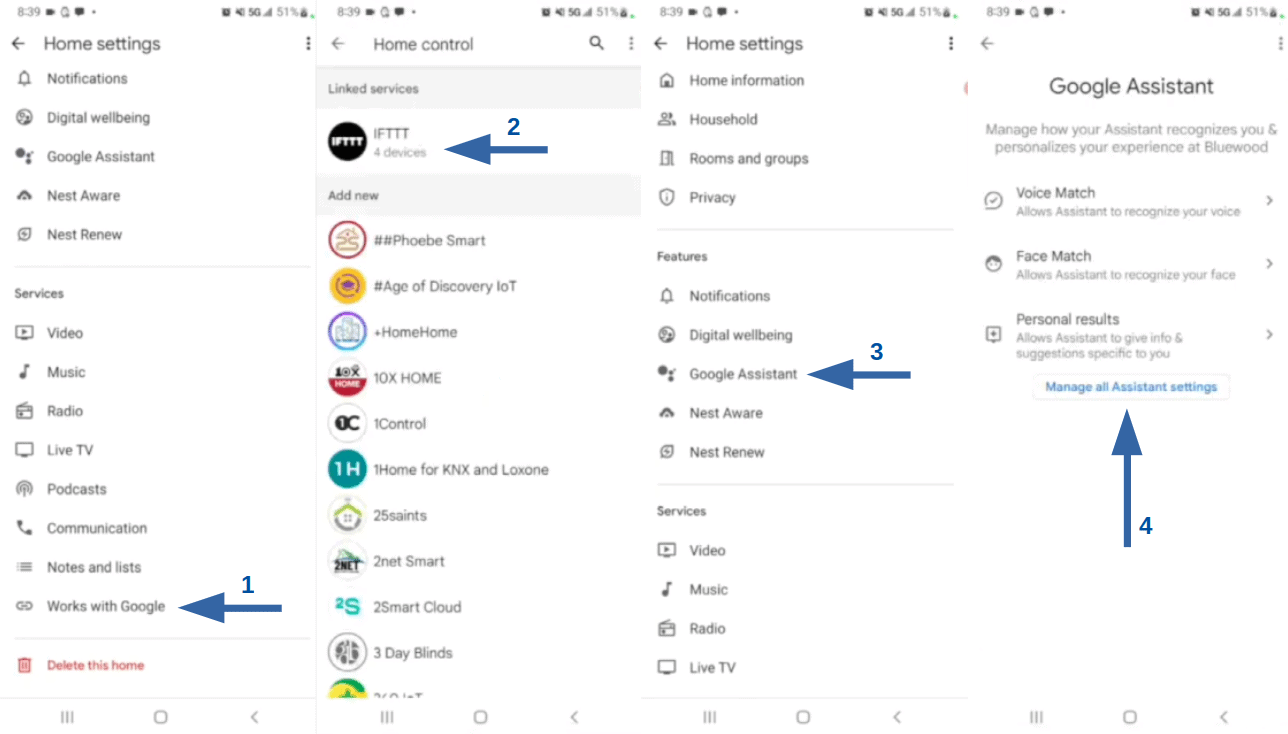
- Open the Google Home app then tap on Settings. On the list of settings, scroll down until you see Works with Google.
- You should see IFTTT under Linked services. This means you’ve successfully linked IFTTT with Google Home and your IFTTT applets are recognized.
- Go back to the list of settings by tapping on the arrow in the top-left corner of the screen. Then, select Google Assistant.
- Tap on Manage all Assistant settings. On the next menu, scroll down and navigate to Routines. Select New near the top-right corner of the screen.
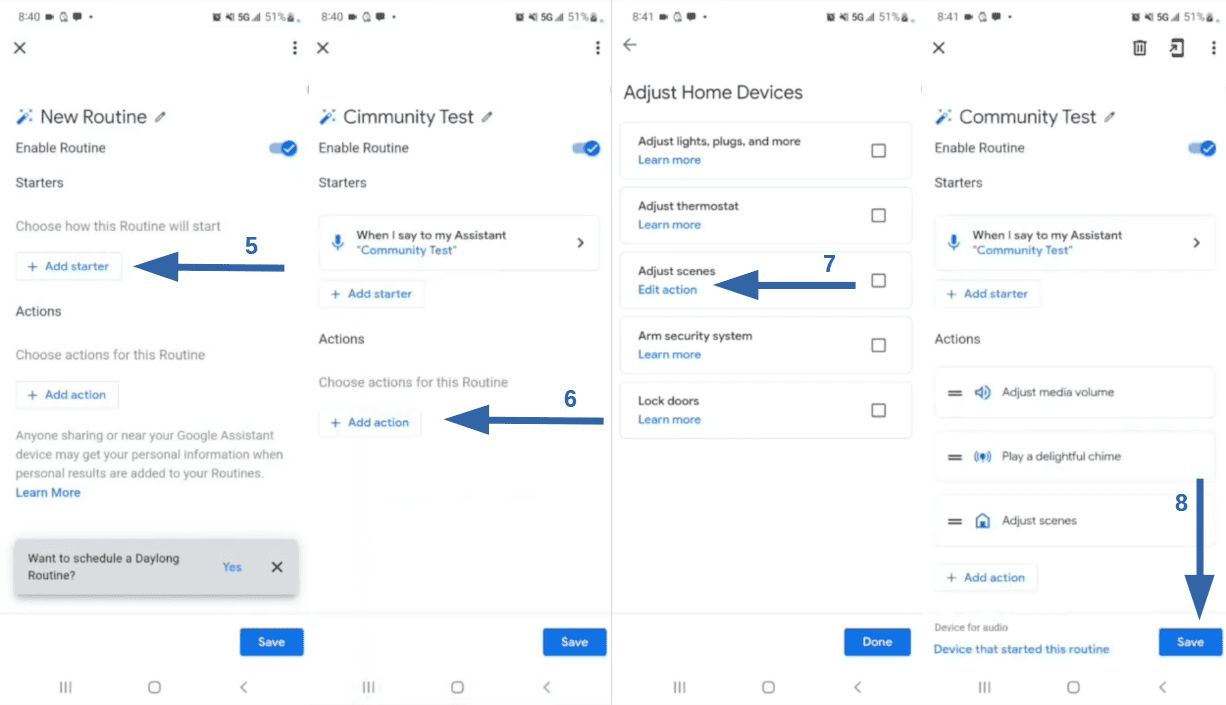
- On the new menu, select Add starter. Choose and set your desired trigger for your Blink camera. This can be a voice command or a specified time trigger.
- After setting your trigger/s, tap on Add action. A list will appear - pick Adjust Home Devices.
- Tap on Adjust scenes, then select the applet for your Blink camera. It should have a checkmark once selected.
- Toggle the checkmark in the top-right corner of the screen. This will bring you back to the Routines menu. Finally, hit Save to finalize the process.
Once you’ve tapped save, you can now exit your Google Home app and test if your Blink cameras are working according to the triggers you set.
Google Home-Compatible Remote Camera Alternatives
While you can get Blink cameras to work with Google Home, you’ll have to jump through a few hoops to do so - it may not be worth the hassle for some users.
If you're still mulling over your surveilance options, there are plenty of smart camera alternatives that already boast compatibility with Google Home. In fact, we can recommend three awesome alternatives to Blink remote cameras off the top of our heads!
You can make a reasonable case for all three, but our favorite for this is Google Nest. They're made by the same company, so the setup process is going to be a lot more streamlined and intuitive. While Ring and Arlo cameras do offer compatibility, users of both products have reported the occasional bug when interacting with Google Home.
Why Aren’t Blink Cameras Natively Compatible with Google Home?
Blink cameras weren’t designed with Google’s software in mind. Blink cameras were manufactured by Amazon, making them function more effectively with Amazon-based products like Alexa.
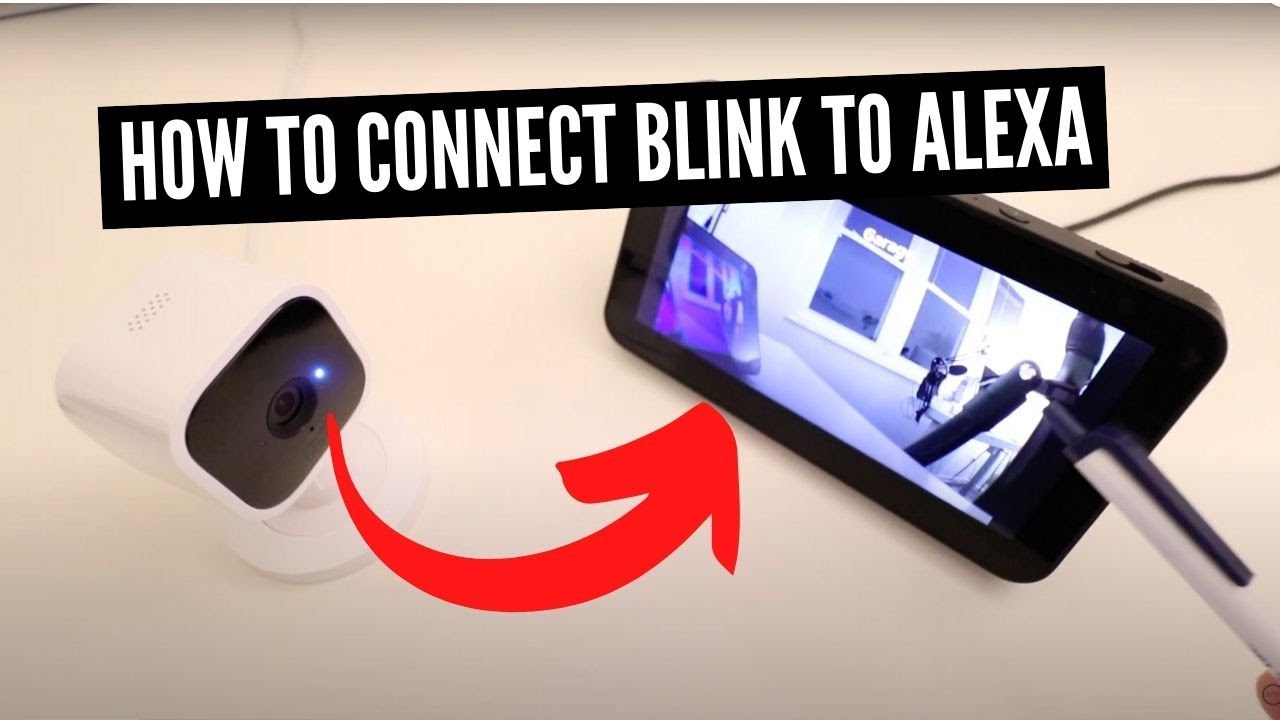
With Amazon Alexa, you won’t need to install a third-party app to automate your Blink cameras. You can quickly connect them to Amazon Alexa through the Blink Home Monitor app, as seen in the video above.


